- Overview of popular vector graphic software (e.g., Adobe Illustrator,
Inkscape)
- Basic tools and their functions
- Creating a simple vector graphic
In Lesson 3, we’ll explore some
of the most popular vector graphic software used by professionals and
enthusiasts alike. These tools are essential for creating and editing vector
images, which are composed of paths defined by mathematical expressions,
allowing them to be scaled without loss of quality.
Adobe Illustrator
Adobe Illustrator is the leading professional vector graphics software, offering advanced features for pixel-perfect artwork and precise shape alignment. It facilitates easy export of drawings, supports access to Adobe Stock for templates, and utilizes Creative Cloud Library for convenient storage and access to brushes, shapes, colors, and styles across devices. The latest version features faster font finding, live font previews, and enhanced zoom capabilities. Notably, users can now fill objects with placeholder text for improved design visualization and import text into any path or shape.
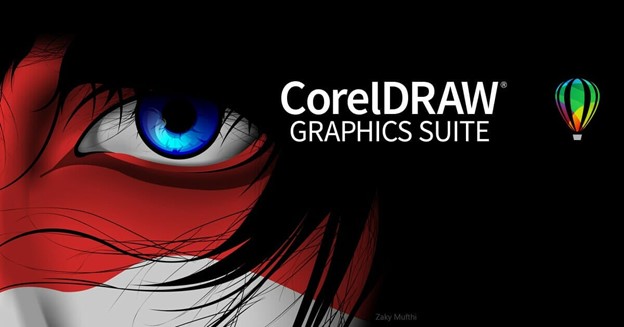
CoreIDRAW Graphics – Stunning vector graphics
CorelDRAW, a well-known vector graphics software, is a professional tool offering compatibility with previous Windows versions and supporting a diverse range of formats, including AI, PSD, PDF, JPG, PNG, SVG, DWG, DXF, EPS, TIFF, DOCX, PPT. It boasts features like multi-monitor and 4K display support. Font Manager simplifies font organization with advanced filtering and search. New capabilities include hiding objects, copying curve segments, and utilizing the knife tool for precise splitting. CorelDRAW supports extensions, providing access to downloads within the application.
With over 10,000 clip art items, 2,000 high-resolution images, 1,000 fonts, 350 templates, and numerous frames, files, and patterns, the tool offers a rich resource library. Offering total control over fills and transparency, CorelDRAW facilitates impressive results. Its layout and drawing tools ensure precise positioning and alignment of shapes. Native 64-bit and multi-core support contribute to maximum performance. While the tool is available for a free trial, continued usage requires a purchased license.
Inkscape
Inkscape is a free vector graphics tool, enabling easy creation of shapes, paths, and text. It supports object manipulation, grouping, and layers for efficient editing. The tool offers diverse color options, gradient editing, dashed strokes, and path markers. With node editing, shapes can be easily converted and modified. Inkscape is compatible with SVG and exports to various formats, including PNG, PDF, and DXF. Despite a learning curve, its powerful features make it an excellent choice for vector graphic creation, and it's available for free.
Affinity Designer - Effective UI for vector designs
Affinity Designer, touted as the fastest and most precise vector graphics software, provides a comprehensive toolset, including a pen and gradient tool. Offering exceptional speed and accuracy, it supports smooth 60fps screen panning and a 10000000% zoom for detailed editing. With RGB, CMYK, LAB, and Grayscale color support, ICC color management, and 16-bit channel editing, it caters to diverse color needs.
Compatible with formats like PSD, SVG, EPS, PDF, and FH files, Affinity Designer extends its capabilities to raster graphics, featuring adjustment layers, blend modes, masks, and non-destructive effects. The customizable workspace, unlimited undo option, and stylus compatibility enhance user flexibility. The tool supports a variety of brushes, pressure control, tilt, and vector brush stroke editing. Customizable shapes with corner settings, text addition to vector paths, and a powerful export mode for selective exporting make it versatile for designers.
Affinity Designer boasts unlimited artboards, real-time editing for embedded documents, and multiple viewing options like outline, pixel, and split screen. The corner tool simplifies rounding corners on shapes. Suitable for both basic and advanced users, the tool offers a free trial with a purchase requirement for continued use.
Vectr - Free vector illustrations
In vector graphic software, several basic tools are essential for creating and editing designs.
Here’s an overview of some of these tools and their functions:
· Draw Path Tool: This tool allows you to create complex
paths using straight and curved segments. It’s fundamental for outlining shapes and defining the
structure of your design1.
· Pencil Tool: With the pencil tool, you can draw
freeform paths as if you were drawing with a pencil on paper. It’s great for more organic shapes and quick sketches1.
· Calligraphy Drawing Tool: This tool simulates the effect of a
calligraphy pen, creating paths with variable width that respond to the
direction and speed of your stroke. It’s useful for stylized lettering and decorative
elements1.
· Typography Tools: These tools enable you to add and edit
text in your designs. You can adjust fonts, size, alignment, and other
properties to integrate text seamlessly with your graphics2.
· Design Templates: Many vector graphic software programs
offer pre-built templates that you can use as a starting point or for
inspiration. These templates can save time and help maintain design
consistency2.
Creating a simple vector graphic
is a fun and rewarding process that can be done using various vector graphic
software. Here’s a step-by-step guide to creating a basic vector graphic:
1.
Choose Your
Software: Select a vector graphic editor
like Adobe Illustrator, Inkscape, or Vectr. Vectr is a free online vector graphics editor
that is user-friendly and suitable for beginners1.
2.
Set Up Your
Canvas: Open your chosen software and
create a new document. Set the canvas size according to your needs.
3.
Draw Basic
Shapes: Use the shape tools
(rectangle, ellipse, polygon, etc.) to draw basic shapes on your canvas. These
will form the building blocks of your design.
4.
Create
Paths: Use the Pen tool or Pencil
tool to draw custom paths. The Pen tool allows for more precision, while the
Pencil tool is better for freehand drawing.
5.
Edit Paths
and Shapes: Adjust the anchor points on
your paths to refine the shapes. You can add, remove, or move anchor points to
change the path’s direction and curvature.
6.
Apply
Strokes and Fills: Select your shapes or paths
and choose a stroke color, width, and style. Then, apply a fill color or
gradient to the inside of your shapes.
7.
Arrange
Layers: Organize your shapes and paths
in layers. This will help you manage complex designs and make selective edits
more easily.
8.
Save Your
Work: Once you’re satisfied with
your graphic, save it in a vector format like SVG, EPS, or AI. This will
preserve the scalability and editability of your design.
For a more detailed tutorial, you can visit Vectr’s website, which
provides a quick start guide and other resources to help you create beautiful
vector graphics with ease1. Remember, practice is key, so
don’t hesitate to experiment with different tools and techniques to develop
your skills. Happy designing!


0 Comments